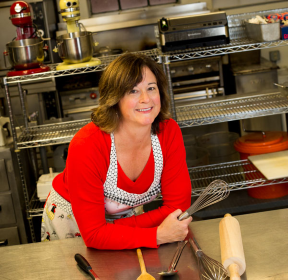
Hello everyone-
I was about to post a recipe for a lovely Red Velvet Cake and thought about many tips I’d like to share before I post the recipe. Don’t worry, I’ll post the recipe next! Tape these tips to the inside of one of your cupboards for easy reference.
CAKE BAKING & FROSTING TIPS:
1) Be sure to preheat the oven. An oven thermometer is a very good idea. Most ovens are off 25-50 degrees! Adjust the temperature until you get the temperature required for your recipe.
2) Prepare your pans before you begin mixing the ingredients for the cake. For layered cakes, always coat generously with cooking spray and then flour. Nothing like baking a beautiful cake and you can’t get it out of the pan! The Pam for baking (with flour) works great too.
3) Never open the oven until the cakes have been in at least 10 minutes. This is when the structure of the cake is building. It’s critical to follow this rule. In fact, I wouldn’t open it until it’s been baking at least 20-25 minutes.
4) Do not attempt to move the cakes around in the oven after you’ve put them in, they will most likely fall. Not good.
5) Testing for doneness. When you have lots of practice, you will be able to tell the doneness of a cake by touching the top. When it springs back, it’s done. Otherwise, the old toothpick trick is great. When it comes out clean, it’s done. It is virtually impossible for a recipe to tell you exactly to the minute baking times. This is why the recipe will often say 20-25 minutes. Set your timer for 20, check the cake at that time. It may be done or you may have to bake it an additional 5 or more minutes.
6) When the cakes come out of the oven, immediately run a knife around the edges. Allow the cake to cool for at least 10 minutes before you invert onto a plate, then re-invert onto a cooling rack. Cool completely before frosting.
7) When assembling a two or three layer cake, you’ll want the cakes to be relatively flat. If your cake has a dome like top, use a long serrated knife to level it off. (It is critical here to go ahead and taste the cake. You know, for quality control purposes) Place the cut side down either on the plate or on the top of the bottom layer. It is far easier to frost the bottom part of the cake (the part that was in the pan as opposed to the cut side) Hope that makes sense!
8) Use lots of frosting. Joking aside, it’s quite nice to not worry about crumbs in your finished cake. You first do a “crumb” layer. Refrigerate the cake for at least 30 minutes before proceeding to the final layer.
9) Put a splotch of frosting on the plate to hold the cake in place. Put your first cake, cut side down if necessary and ice the top of it. Proceed to layer two and layer three. Using lots of frosting, ice the sides filling in any gaps between the layers. Finally, frost the top.
10) Frost the chilled cake with the final layer of room temperature frosting. If you prefer a very smooth surface on your cake, you can dip your spatula into water and smooth out the seams on your cake.
11) Add decorations or fresh edible flowers to your cake if you like. If you’d like to learn basic decorating techniques, I highly recommend signing up for a Wilton Cake Decorating class. It’s really fun and you learn lots of different boarders and frosting techniques.
Happy cake baking!
Angie


 Follow me on Twitter