Tilapia With Kalamata Olives & Grape Tomatoes…..

orng chx slm patDSCN2920_2600

Tis the season to lighten things up!  I don’t know about you but I’ve gotten into quite a nibbling habit over the past few weeks.

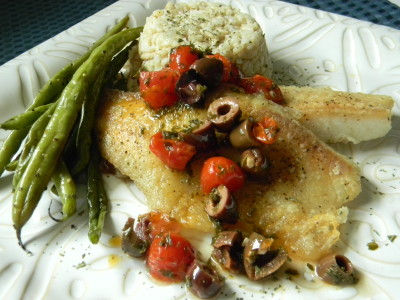
Tilapia is  a favorite of mine.  It’s mild and thaws beautifully.  My kids really love it plain without fuss.  I kept their portions plain and I decided to liven up the rest for Joe and me.  I put a mediterranean twist on a brothy sauce I served with the fish.  Loved it when it pooled  into the rice pilaf.  No heavy, cheesy, creamy indulgent sauce.  Just delicious.

You will notice that I do not add salt to the sauce as the kalamata olives are quite salty.  Taste the sauce at the very end, (with an olive) before adding more seasoning.

Tilapia with Kalamata Oives & Grape Tomatoes

4 tilapia fillets, thawed
salt & Pepper
1/3 cup cornstarch
Olive oil

For the sauce:

2 tablespoons olive oil
2 teaspoons (or more) minced garlic
1/2 cup sliced kalamata olives, halved
1/2 cup ripe grape tomatoes, halved
1/2 cup white wine
1/2 cup chicken broth
1 tablespoon lemon juice
2 tablespoons fresh parsley

For the fish:

1)  Preheat the oven to 350′.  Line a cookie sheet with foil and coat with cooking spray.
2)  Heat a non stick or cast iron skillet over medium heat, add olive oil to coat the bottom of the pan.
3)  Put cornstarch into a medium size bowl.  Season the fish with salt and pepper.  Dredge into the cornstarch shaking off excess.  Carefully add the fish to the hot pan with the olive oil.  Resist the temptation to move things around in the pan.  You want the fish to get nicely brown without falling apart.  About 5 minutes per side.
4)  Place the fish on the prepared cookie sheet.  Bake for 20 minutes.

For the sauce:

1)  Add 2 tablespoons of olive oil to a medium sauce pan over medium heat.  Once hot, add the garlic, cook for about one minute.
2)  Add the olives and tomatoes, allow to cook for about two minutes.
3)  Add the wine, chicken broth and lemon juice.  Lower the heat and simmer for about 5 minutes.  Season to your own taste.  Spoon the sauce over the fish.  Serve with rice pilaf and steamed or oven roasted green beans.

Enjoy!

Angie
Grilled Salmon with Brown Sugar and Mustard Glaze…..

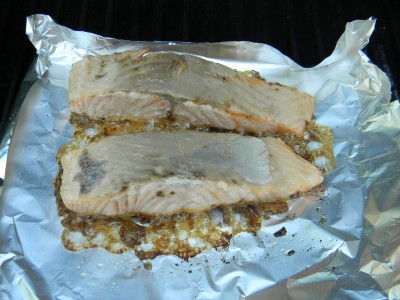
This recipe for salmon couldn’t be more simple.   My friend Mickey shared her recipe years ago and it’s been a favorite of mine ever since.

Amazingly, there are only three ingredients.  Salmon, whole grain mustard and brown sugar.  That’s it.  It is best prepared on the grill.  You’ll want to flip the salmon onto a piece of non stick foil to finish the cooking otherwise you will lose all the goodies in the grill.

Preheat the grill.

You will need:

4 6-8 ounce salmon fillets
8 tablespoons of whole grain mustard
8 tablespoons brown sugar

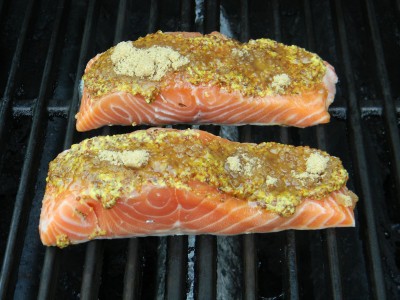
Start by rinsing the salmon and patting dry with a paper towel.  Place on a plate for grill transport.  Spread 2 tablespoons of mustard evenly over each piece of salmon.  Add the brown sugar, patting it into the mustard.

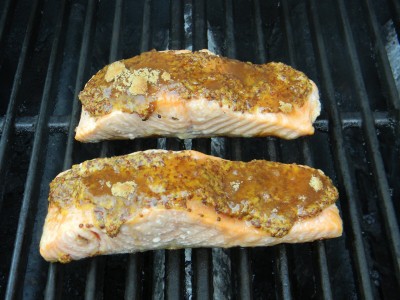
Gently place the salmon fillets on the grill, skin side down.  Close the lid and let them cook for about 8 minutes.
The fillets should now look opaque.
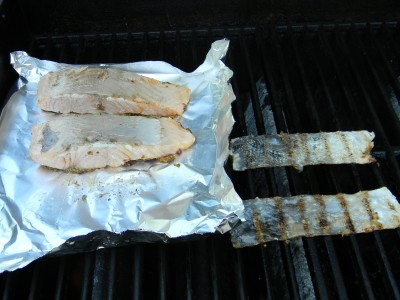
Gently slide your spatula between the flesh of the salmon and the skin and flip onto the non stick foil.  You can see that I’ve turned the edges of the foil up to keep the topping from dripping into the grill.  Close the lid and cook for  5-7 minutes.  Discard the skin.
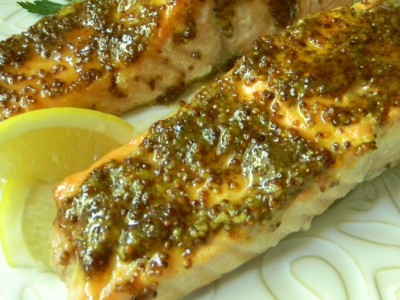
 The salmon is done and you can see that the mustard and brown sugar have caramelized.  Carefully remove the fish/foil from the grill.  It is easy to slide onto a flat cookie sheet.  Turn the salmon over onto a clean serving plate and spoon the mustard/sugar mixture over the salmon.

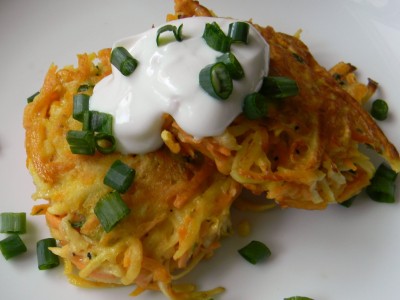
Serve with sweet potato and parsnip latkes  and oven roasted asparagus.  Elegant and delicious!

Have a great evening!

Angie

Chili Lime Shrimp with Lime Cilantro Brown Rice Salad…..

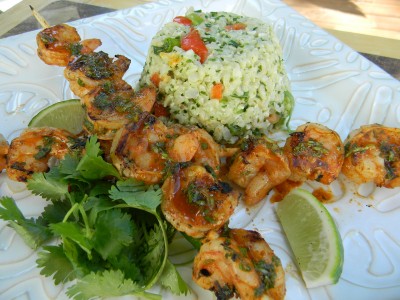
In case you haven’t yet noticed, I am in love with lime and cilantro.  This combination is fresh and makes most any grilled fish, chicken, or salad absolutely delicious!  I made this combination for the first time over Labor Day weekend and it got rave reviews.

For starters, marinated and grilled fish takes minutes.  Really.  I then save a bit of the delicious marinade to spoon over the cooked fish and a little over the salad…DELISH!  This brown rice salad is a wonderful accompaniment to the Grilled Chili Lime Shrimp.   The brown rice lends the perfect texture, the green onion and red bell pepper a little crunch, and the crumbled cheese a little salt and cream.  It’s perfect.

Why not make a whole bag (about 5 cups uncooked) of brown rice and freeze it for later use?  Defrost and use in this salad or any other quick weeknight dinner.  It’s best to use completely cooled rice for the salad.

Grilled Chili Lime Shrimp

1 lb. raw shrimp, peeled and deveined, and skewered

Marinade:
1/4 cup fresh lime juice
2 tablespoons honey
2 tablespoons canola oil
2 tablespoons chili powder (mild or to your own taste)
1 clove fresh garlic, crushed
1 cup fresh cilantro, chopped

1)  Combine all of the marinade ingredients, whisk well to combine.  Reserve a couple of tablespoons of the marinade to spoon over the cooked shrimp.  Use the rest of the marinade for the raw shrimp.  Marinade for 20 minutes before grilling.  Skewer the shrimp and cook over medium high heat for 4-5 minutes.  Shrimp will be bright pink when they’re done.  Spoon the reserved marinade over the shrimp when  ready to serve.  Makes 4 servings.

Lime Cilantro Brown Rice Salad

Dressing:
1/4 cup fresh or bottled lime juice
2 tablespoons honey
2 tablespoons olive oil
1/4 teaspoon salt or more to taste
1/8 teaspoon black pepper

Salad ingredients:
2 cups cooked and cooled brown rice
1 small red bell pepper, seeded and chopped
1 bunch green onions, thinly sliced
1 large bunch fresh cilantro, chopped
4 ounces *Fresco Mexican cheese, crumbled

1)  Whisk dressing ingredients together in a large mixing bowl.
2)  Add the salad ingrediens to the dressing bowl.  Mix well to combine.  Taste and add more salt and pepper if necessary.  Makes four 1/2 cup servings.

*Fresco Mexican Cheese is made from cow’s milk.  It tastes a bit like mozzarella yet has a crumbly almost grainy consistency.  It doesn’t  melt completely like mozzarella.
**If you’d like a more spicy shrimp, add a couple of pinches (or more) of cayenne to the marinade.
***If you’re using bamboo skewers, soak them in water for 20 minutes before using to prevent burning on the grill.

Baja Fish Tacos with Avocado Cream and Fresh Cilantro Salsa…..

My family LOVES this dish.  What is it about being able to assemble your dinner that is so appealing to kids?  Whatever it is, I love when they go for a healthy meal such as this one.  There is some prep involved, but you can make the avocado cream and the salsa a day or two ahead.  Feel free to use bottled salsa.  The fish takes minutes.

We’ll start with the avocado cream….

Cut the avocado in half.  Carefully score the inside of the avocado as pictured.  Squeeze the skin side together and the avocado will easily come out. 

Put the avocado right into the food processor, I’m using a mini Cuisinart.
Add low fat plain yogurt….
Mayonnaise….
Lime juice…
Honey….
Fresh cilantro, kosher salt, and water….Give it a whirl until smooth….
It should look like this.
Cover the avocado cream with plastic wrap before putting sealing with the lid.  this will keep the air out and will keep it from turning brown.  Do this with guacamole as well.
For the salsa…
You will need a large can of petite diced tomatoes, fresh cilantro, fresh onion, lime juice (fresh or bottled) a small green pepper, seeded and chopped, a jalepeno, granulated garlic powder, and salt…Add half of the canned tomatoes to a food processor, once smooth, add the remaining diced tomatoes for a chunky texture.
Fresh and delicious!  Refrigerate until you’re ready to use.
For the fish….

You’ll need to make the Baja rub for the fish.  Double or even triple this recipe and save it for the next time.  Be sure to separate what you’re going to save before you start seasoning the fish so you do not contaminate the rub you will be saving.  Label and date.  Seasonings needed are:  brown sugar, chili powder, cumin, granulated garlic powder, sweet paprika, oregano, cayenne, salt, and allspice.

Mix all ingredients together and break up any lumps with your fingers.

You’ll need 6 tilapia fillets, rinsed and patted dry with a paper towel.  Brush each fillet with canola oil.

Season each piece of fish with the rub mixture.

 Each piece of fish should be well coated…Heat a non stick skillet with canola oil over medium high heat until very hot.

Cook fish for 4 minutes per side, try not to crowd the fish.
The brown sugar in the rub will caramelize the fish a bit…delicious on its own….wait until you taste the avocado cream, fresh salsa, and spicy flavors of the fish…  it’ll knock your socks off!

Flake the fish with a fork.  Squeeze fresh lime juice over the fish.  Now you’re ready to eat!

Baja Fish Tacos with Avocado Cream and Fresh Cilantro Salsa

For the Avocado Cream:
1 whole ripe avocado, cut into chunks
2 tablespoons low fat plain yogurt
1 tablespoon mayonnaise
1 tablespoon lime juice, fresh or bottled
1 tablespoon honey
1 small bunch cilantro
2 pinches of kosher salt
¼ cup water

Place all ingredients into a food processor and give it a whirl until smooth. Cover with plastic wrap and refrigerate until ready to use. Good for one week refrigerated.

For the Fresh Salsa:
1 28 ounce can petite diced tomatoes
1 whole jalapeño
1 small onion or ¼ of large
1 small bunch fresh cilantro
½ teaspoon granulated garlic powder
3 pinches of kosher salt

Place HALF of canned tomatoes into food processor. Add HALF of the jalapeño, seeds and all. Add the rest of the salsa ingredients. Whirl until smooth. Taste. If you’d like more heat, add the rest of the jalapeño pepper and process until smooth. Pour into mixing bowl and add the rest of the canned tomatoes. Mix and taste. Season with more salt if necessary. Refrigerate up to two weeks.

For the Fish:
6 tilapia fillets, rinsed and dried with a paper towel
1-2 tablespoons canola oil for coating fish

Rub:
1 ½ teaspoons brown sugar
1 ½ teaspoons chili powder
1 teaspoon cumin
1 teaspoon oregano
¾ teaspoon granulated garlic powder
¾ teaspoon sweet paprika
¼ teaspoon ground cayenne pepper
¼ teaspoon ground allspice
½ teaspoon kosher salt

2 tablespoons canola oil for cooking

1 fresh lime, cut into wedges
2 cups shredded lettuce
2 plum tomatoes, seeded and finely diced
1 cup shredded cheddar cheese
12 soft corn tortillas or hard corn shells

1) Mix all rub ingredients together in a small bowl. Brush fish fillets with oil. Coat both sides of fish generously with the rub. Heat a non stick pan over medium-high heat with oil. Cook fish in the hot pan, do not crowd, for 4 minutes per side.
2) Remove from heat onto a platter, flake with a fork. Squeeze fresh lime juice over fish. Cover with foil to keep warm.
3) Wipe out fish pan and warm tortillas one minute per side in the pan and place into a bowl lined with a clean napkin or kitchen towel to keep warm.
4) Layer over warm tortilla; lettuce, tomato, cheese, fish, avocado cream, and salsa. Serves 4.  Enjoy!

Salmon Patties…..

You may have noticed that I’m on a bit of a fish kick so far this year.  Serving fish can get a bit costly, so I thought I’d share this economical and delicious way to enjoy salmon.  Canned salmon is readily available. Keep some in your pantry for a quick satisfying supper.  Serve with simple rice pilaf and a salad or steamed frozen vegetables.

Here we go….

Preheat your oven to 400′ and non stick foil line a cookie sheet.  Add about one tablespoon of olive oil to the pan and spread to coat with your hands.  Set aside.

Finely dice the red onion and the red and yellow peppers, saute in olive oil until soft.  Allow to cool.

This is an important step.  You want to remove any bones and excess skin, while leaving large chunks of salmon.  (Your kitty cat might enjoy these:-)  The bones are soft from the canning process.)

It should look like this…

Now add chopped parsley, the cooled pepper mixture, and lemon juice to the salmon.  Don’t mix just yet…

Add the bread crumbs and gently mix.

Whisk the eggs, mayonnaise, mustard, salt and pepper together.  Add to the salmon mixture.  Gently fold all ingredients together.  

Shape into patties and coat with additional bread crumbs.  At this point you can bake or refrigerate if you want to serve them later.

Give each patty a light drizzle of olive oil and into the oven, 8 minutes per side.  Enjoy!
Salmon Patties

1 small red pepper, seeded and finely diced
1 small yellow pepper, seeded and finely diced
1 small red onion, finely diced
1 tablespoon olive oil
1 14 ounce cans salmon
2 tablespoons lemon juice
¼ cup chopped parsley
2 eggs
3 tablespoons mayonnaise, you can use light if you wish
1 teaspoon Dijon mustard
1 ½ cups unseasoned bread crumbs
½ teaspoon salt
¼ teaspoon pepper
Additional olive oil for drizzling

1) Preheat oven to 400’. Line a cookie sheet with non stick foil and drizzle with olive oil to coat, set aside.
2) Dice the red and yellow peppers, and onions. Heat a skillet over medium heat and add olive oil, peppers, and onions. Sauté for 8-10 minutes or until soft. Set aside to cool.
3) Open canned salmon and drain off excess liquid. Carefully remove the skin and bones, discard.  Add salmon to a medium size mixing bowl. Handle salmon as little as possible, you want nice large chunks in your patties.
4) Add the cooled pepper and onion mixture, parsley, and lemon juice to the bowl. Add 1/2 cup bread crumbs and gently mix.  In a small bowl, whisk the eggs, mayonnaise, mustard, salt, and pepper until well blended. Pour over salmon.  Gently fold ingredients together until everything is well blended.
5) Put remaining 1 cup of bread crumbs into a small bowl.  Form 4” patties with your hands and coat patties with bread crumbs. Place on prepared cookie sheet.
6) Bake for 8 minutes, then carefully give the patties a turn. Bake another 8 minutes. Makes 8 salmon patties. Serve immediately with fresh lemon wedges.  Enjoy!

*If you want to make ahead, prepare them all the way up to baking and refrigerate. Bake an additional one minute per side.
*If you’d like to spice them up, add minced jalapeno pepper when sautéing the peppers and onions or add a couple dashes of hot pepper sauce.

Enjoy!

Corn Tortilla Encrusted Tilapia with Avocado and Corn Salsa…..

I have been making so many sweets lately, I decided to mix it up a bit with a little lighter fare! 

This is a very simple and delicious way to serve tilapia.  Feel free to use just about any mild white fish.   I use a food processor to pulverize fresh corn tortillas.  Baking at a high temperature crisps the coating without frying, it’s fantastic!  Serve with simple rice pilaf and steamed snap peas, let the fish and the salsa be the star of the meal.   If entertaining, prepare the salsa and have the fish oven ready in the refrigerator.  The fish cooks in only 12 minutes.

Corn Tortilla Encrusted Tilapia

With Corn, Avocado Salsa

For the salsa:

1 ½ cups frozen white corn, thawed
1 small red pepper, seeded and diced
1 medium avocado, cubed
½ cup seeded and diced cucumber
4 tablespoons chopped cilantro
2 limes, juiced
1 clove garlic, crushed
1 small jalapeno, seeded and minced (optional)
¼ teaspoon salt
1/8 teaspoon pepper

For the Fish:

4 large tilapia fillets
Salt and pepper
1 ¼ cups flour
2 eggs, beaten
2 tablespoons water
5 small corn tortillas, pulverized in food processor

1) Into a medium size bowl, combine all of the salsa ingredients, mix well and put into an airtight container and refrigerate.
2) Preheat oven to 425’. Line a cookie sheet with Reynolds non stick foil. Add 2 teaspoons of olive oil to the cookie sheet and evenly spread the oil over the foil. Set aside.
3) Tear the tortillas into small pieces and place into the food processor. Process until the tortillas resemble coarse bread crumbs. Place into a bowl for coating fish.
4) Into a second container, add the flour. Into a third container add the eggs and water, beat well.
5) Season the fillets with salt and pepper. Then dip into the flour, shake off excess. Dip into the egg, then into the tortilla crumbs, pressing the crumbs into the fish. Place on prepared cookie sheet. Drizzle with a very small amount of olive oil. Bake for 12-15 minutes.   Serve with salsa.

Enjoy!

Grilled Garlic Shrimp Over Baguette….

When I had my gal pals over for food and bubbly, this seemed to be the favorite.  This is a beautiful and extremely flavourful appetizer.  At the end when you put the shrimp on top of the bread, be sure to baste with plenty of the flavorful butter and garlic mixture.  It will soak into the yummy grilled bread.  There are a few steps in the preparation process, but they’re very simple.  If you’re entertaining, prepare everything right up to the cooking.  All you’ll have to do is about 10 minutes of grilling and you’re ready to serve.

Garlic Lemon Shrimp Over Grilled Baguette

2 lbs. large deveined frozen shrimp, thawed and peeled leaving tails
2 tablespoons olive oil
Pinch of salt and pepper
16-18 6” bamboo skewers, soaked in water for 20 minutes

For the lemon butter:

4 tablespoons unsalted butter
2 tablespoons olive oil
3 cloves crushed garlic
2 pinches kosher salt
2 pinches black pepper
1 whole lemon, zested, then juiced
2 large baguettes, cut into 6″ pieces, then halved

Garnishes

3 tablespoons Italian parsley, finely chopped
2 lemons cut into wedges

1) If you’re using bamboo skewers, soak in water for 20 minutes. To thaw frozen shrimp: place in a large bowl and allow cold water to slowly run into bowl and down drain. Once thawed, peel and drain in colander. Put shrimp into a dry bowl. Toss with olive oil, salt, and pepper. Skewer 2 per skewer. Refrigerate.
2) Put all sauce ingredients into a microwavable dish. Refrigerate.
3) When ready to cook, preheat grill.  Cut baguette and set aside.
4) Microwave the sauce ingredients until just melted.
5) Grill the bread first on both sides, you just want to get the bread a little crunchy with grill marks.  Cut each piece in half on a diagonal and place on a large serving platter. Grill the shrimp for 2-3 minutes per side or until bright pink. Immediately place the grilled shrimp on the grilled bread in a criss cross.
6) Generously baste with the lemon and garlic butter mixture. Garnish with chopped parsley and a fresh lemon wedge.  Enjoy!

Isn’t this an elegant presentation???

Enjoy!
Angie


Crunchy Baked Cod with Tarter Sauce…..

Cod is a very mild and flaky fish.  I buy it frozen because it is flash frozen right after it is caught.  It is the best way to buy fish in the midwest.  As always, refrigeration thawing is the best, it will take about 24 hours.  You can also defrost in a bowl in the sink under slowly running water.  It will take about an hour this way.  It doesn’t last long frozen, so use it up within a couple of weeks after you buy it.

This is an excellent and easy way to prepare cod.  My boys devour it!  I love the tarter sauce, I cut the mayonnaise with some fat free yogurt, you cannot tell the difference, it’s very good!

Crunchy Cod with Tarter Sauce

4 6 oz. pieces of cod
Salt and pepper
1 tablespoon butter
1 tablespoon olive oil
1 tablespoon Dijon mustard
1 pinch cayenne pepper
1 cup saltine crackers, coarsely crushed
Tarter sauce:

¼ cup mayonnaise
1/3 cup plain non fat yogurt
2 tablespoons sweet pickle relish

1) Line a cookie sheet with Reynold’s non-stick foil. Preheat oven to 400’.
2) Rinse cod and dry with a paper towel. Season lightly with salt and pepper.
3) In a small microwavable bowl, add butter and olive oil. Microwave until butter is melted. Whisk in Dijon mustard and cayenne.
4) In a medium size bowl, add cracker crumbs.
5) Using a pastry brush, generously coat each piece of fish with the butter mixture. Coat fish with the cracker crumbs, pressing crumbs into fish to coat.  Place on prepared cookie sheet.
6) Bake for 15-18 minutes. While fish is baking, mix sauce ingredients together in a small bowl. Serve immediately. Enjoy!

Panko and Fresh Herb Encrusted Tilapia

This is a family favorite.  If you haven’t used panko bread crumbs before, you’re in for a treat!  They make anything you bread light and crunchy.  Have your dipping station set up and ready to go.  If you care for a little tarter sauce, simply mix together 1/3 cup plain non fat yogurt, 1 tablespoon mayonnaise, and 2 tablespoons sweet pickle relish.  Whisk until well blended.  Round out your meal with brown rice pilaf and a green vegetable.  This will soon be a favorite of your family too!  Enjoy.

5-6 tilapia fillets
Salt and pepper
1 cup all purpose flour
2 large eggs, beaten
2 tablespoons water
1 1/2  cups panko crumbs, you can find in the Asian isle of the grocery store
2 tablespoons flat parsley, finely chopped
2 tablespoons chives, finely chopped
Vegetable oil for pan browning

1) Reynolds non stick foil line a cookie sheet and preheat oven to 400’.
2) Rinse and drain fish fillets. Season with salt and pepper
3) You will need three containers to bread the fish. Into the first, the flour. Into the second, the beaten eggs and water. Into the third, the panko crumbs, parsley, and chives, mix well to distribute herbs.
4) Heat a non stick skillet over medium high heat and add enough oil to cover the pan. Working one at a time and in this order, dip each fillet into the flour, then egg mixture, then into the panko. Press crumbs into fish. Carefully place breaded fish into the hot and oiled pan. Cook 2-3 minutes and turn, cook another 2-3 minutes. Remove from pan and place on prepared cookie sheet. Bake for 15 minutes.

*note* if you’re making this for a dinner party, prepare the fish all the way to browning. Place in a container and use wax paper between layers and refrigerate immediately.   Simply bake for 20 minutes before you’re ready to serve.

Shrimp Cocktail

RECIPE:
1- 2 lb. package frozen cooked & peeled shrimp

1 cup ketchup
3 tablespoons prepared horseradish
2 tablespoons brown sugar

To thaw shrimp, place into a large bowl in sink and allow water to slowly run into bowl, stir frequently.  Drain well.

Sauce:
Mix well, refrigerate.  Serve with cooked & peeled shrimp.  Garnish with fresh parsley and fresh lemon wedges or slices.