Black & Whites…..

orng chx slm patDSCN2939_2619

It’s been quite some time since I’ve posted a recipe and I sure miss it!

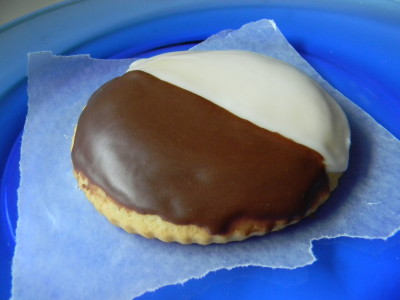
Ever had one of these?  It is believed they originated from New York.  The original cookie calls for a thin layer of icing then half vanilla fondant and half chocolate fondant. I am not particularly fond of fondant so I simply ice the cookie with half vanilla and half chocolate icing.  I use my go to sugar cookie cut out recipe.

Icing this cookie takes a little practice.  I recommend making the vanilla icing first, icing half of the cookie, and letting it set up at room temperature, uncovered for at least an hour.  You then add Hershey’s Cocoa to the vanilla icing with a little more milk and ice the other half.  Be careful not to add too much liquid as the icing will ooze off the cookie.  Allow it to set up for 3 or more hours.  Then they’re good to go!  Iced cookies such as these do not freeze well.  If you want to freeze them I suggest freezing them un-iced, then icing them upon thawing.

This cookie recipe is large.  If you’re not up to making 6 dozen cookies, freeze half of the dough.  Wrap it tightly in plastic wrap, then into a freezer bag.  Label and date.  Use it within 3 months or so, the sooner the better.  Thaw in the refrigerator for 24-48 hours before using.

Best Roll Cut Out Sugar Cookie Recipe  (makes about 6 dozen large round  5″cookies)

2 cups sugar
4 sticks unsalted butter, one pound at room temperature
5 large eggs
1 tablespoon vanilla
7 ½ cups all-purpose flour
4 teaspoons baking powder
1 teaspoon salt

1) In a large mixing bowl, beat butter until fluffy and add one half of the sugar, beat, then add the rest. Add two eggs and beat. Scrape down the side of the bowl. Add the remaining three eggs and vanilla, beat until nicely incorporated.
2) Lightly measure out flour into a separate mixing bowl. Add baking powder and salt, whisk until blended.
3) Add half of the flour mixture to the egg/butter mixture and beat well. Add remaining flour and blend until all ingredients are incorporated.
4) Shape into a large ball and wrap in plastic wrap, then put into a large zip bag. Refrigerate for an hour or overnight.  It is easier to roll if you refrigerate it for the lesser amount of time.  If it’s chilled overnight, let it sit at room temperature for 45 minutes or so to warm up a bit.
5) Preheat your oven to 375’ and line cookie sheets with parchment paper. Have cooling racks ready to receive hot cookies.
6) Cut off a chunk and begin working with your hands to make it pliable enough to roll out on a floured surface. Roll to 3/8” to 1/4″ thickness. Cut into large circles and place on prepared sheets, leaving at least 1” of space between cookies. Bake for 10-12  minutes. Cool for five minutes before removing from cookie sheet onto a rack. Cool completely before icing.

Vanilla Icing (this will be enough for half of the recipe, if you bake the entire batch of dough, double the icing recipe)

3 cups powdered sugar
3 tablespoons milk, any kind
1 teaspoon vanilla extract

1)  Mix well, add more milk to make it spreadable but not so loose that it will run completely off the cookie.  Ice 1/2 of the cookie, starting at the center with an icing spatula and continue to the edge.  Again, this will take some practice.  (They will taste incredible even if the frosting isn’t perfect!) Allow the cookies to sit for an hour or so to set up before you start with the chocolate half.

2)  Add 2 tablespoons Hershey’s Cocoa to the bowl.  Begin to mix, you may notice that more milk is needed.  Add more milk a teaspoon at a time.  The cocoa will give it an even better texture than the plain vanilla.  Want it more chocolatey?  Add more cocoa, 1 tablespoon at a time.  Carefully ice the other half of the cookie, starting with the seam down the center then going to the outer edges.   Need more icing?  Add 1/2 cup powdered sugar to the bowl, a tablespoon cocoa and add enough milk to stir into a rich consistency again.  It is best to let them sit out overnight to completely set up.  Layer in a plastic container with parchment paper between layers.  Enjoy within 2-3 days if they last that long!

Enjoy!
Angie

Interesting Variations:

*Ice the whole cookie with chocolate and immediately add chocolate shavings.
*Ice the whole cookie with vanilla icing and immediately add confetti sprinkles.
*Add a little instant coffee to the chocolate icing and ice the whole cookie chocolate & top with chocolate covered coffee beans.
*If you like orange and chocolate add a tablespoon or two of fresh orange zest to the white icing, YUM!


Luscious Red Velvet Cake…..


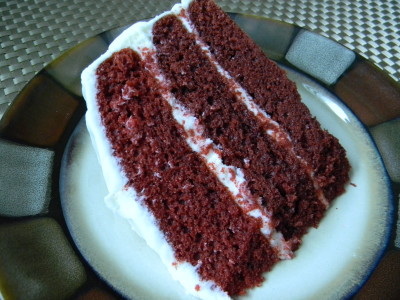
orng chx slm patDSCN3016_2696Red velvet cakes seem to be all the rage these days.  I am particularly fond of one bowl recipes.  This one is very, very simple and really moist and delicious.  Most recipes have only a teaspoon or two of cocoa.  I like to taste more chocolate so I’ve made adjustments to my recipe.

Being that this cake is so moist, I highly recommend lining the pans with parchment paper.  It is awful to have a beautifully baked cake that won’t come out of the pan!!

Red Velvet Cake

2 eggs
1 1/2 cups sugar
2 cups oil
1 teaspoon vanilla
2 1/2 cups all purpose flour
1 teaspoon baking soda
1 teaspoon salt
1 teaspoon vinegar
1 tablespoon liquid red food coloring+ water to equal 2 ounces (or 1 teaspoon gel food coloring)
2 heaping tablespoons Hershey’s cocoa
1 cup buttermilk (or mix 1 teaspoon vinegar + milk to equal 1 cup)

1)  Preheat the oven to 350′.  It is always a good idea to line the bottom with parchment paper.  With a pencil trace around the outside of the pan and cut it out.  Place in the bottom of the pan and coat well with cooking spray.
2)  In a large mixing bowl using  an electric mixer, beat the eggs, sugar, oil and vanilla until well blended.
3)  Sift the flour, soda and salt together in a small mixing bowl, set aside.
4)  In a 1 cup liquid measuring cup, add 1 teaspoon red food coloring and enough water to equal 2 ounces.  Add 1 teaspoon vinegar and the cocoa.  Whisk to thoroughly blend.  Add to the beaten egg mixture and mix well.
5)  Add the flour and the buttermilk alternately to the egg mixture.  Beat until all ingredients are incorporated.  Do not over beat.  Pour into prepared pans.  Bake for 32-35 minutes.  (check at 32)  The top should be firm to the touch and toothpick should come out clean.
6)  Cool completely before icing.

Cream Cheese Frosting

1 8 ounce softened cream cheese
4 ounces softened butter (one stick)
1 teaspoon vanilla
3 cups powdered sugar
milk as needed

1)  With an electric mixer, beat the cream cheese and butter until creamy.  Add the vanilla and the powdered sugar.  Mix on the lowest speed of the mixer and add milk 1 teaspoon at a time to get a smooth spreading consistency.
2)  Ice the cake generously with the frosting.  Refrigerate cake.  Allow to stand at room temperature for 30 minutes before serving.

So delicious and simple to make.  Enjoy!

Angie

Thanksgiving Pie Pictures…..

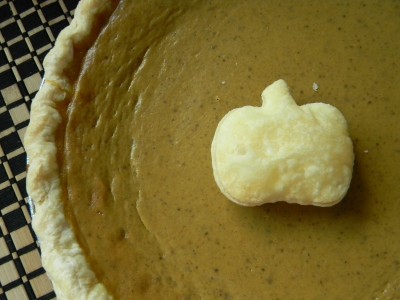
Traditional Pumpkin Pie.  Butter crust.  Pie crust pumpkin cut out.

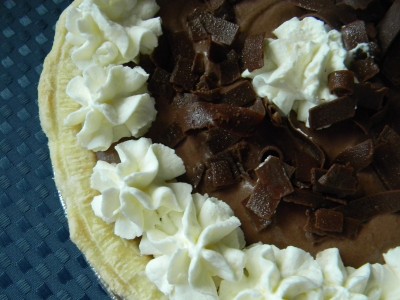
Chocolate Silk Pie. Made with real stabilized whipped cream.  Topped with chocolate shavings.

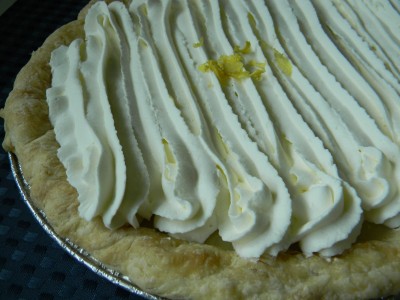
Lemon Cream Pie.  Made with fresh lemon juice and zest.  Topped with stabilized whipped cream.

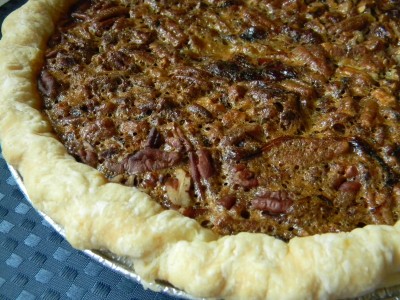
Pecan Pie.  Made with 1/2 pound pecans.  Great with real whipped cream.

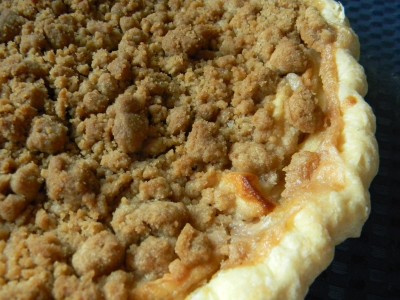
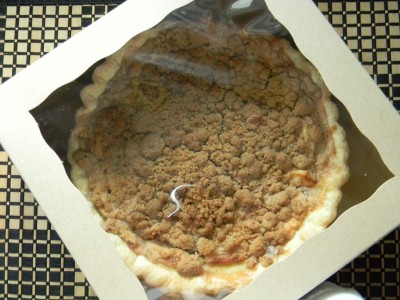
Apple Crumb Pie.  The most popular pie, made with 2 lbs. cinnamon apples per pie.  Topped with butter crumb topping.

Beautiful pie boxes I found on-line.  They were perfect!

I hope you had a wonderful Thanksgiving!

Angie

Individual Key Lime Tarts…..

I love individual desserts.  They are the perfect portion and the presentation is pretty from the first time your guests see them until they’re served.  Sometimes desserts are lovely until they’re cut and served.

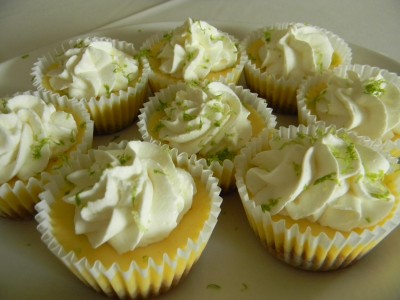
I lined cupcake pans with paper.  This makes it easy for guests to simply pick up and enjoy.

If you use real whipped cream in the can, be sure to top the little minis right before serving as the real whipped cream will totally deflate.  I used real whipped cream and I’ve added plain gelatin to stabilize.  Do this and your whipped cream will be picture perfect for days.   Timing can be a bit tricky.  Do not let the gelatin get too cool as it will set up too much to use in your whipping cream.  Be sure to have everything ready to go before you start on the gelatin. The gelatin should be slightly warm when you start to beat the cream.

Individual Key Lime Tarts

Crust:

1 cup graham cracker crumbs
2 tablespoons sugar
3 tablespoons melted butter

Filling:

5 egg yolks, beaten
1/2 cup key lime juice
1 14 oz can sweetened condensed milk

Cupcake liners

Whipped cream or whipped topping
Fresh lime zest

1)  Preheat the oven to 325′.  Line a cupcake pan with 9 paper liners.
2)  Mix the graham crackers, sugar and melted butter until well blended.  Divide evenly among the 9 papers.  Press into the bottom.  Bake for 4 minutes, remove from oven.
3)  Whisk the egg yolks, lime juice and sweetened condensed milk until well blended.  Divide among the 9 paper lined pan.
4)  Bake for 12-15 minutes or until the mini tarts are set. (no wiggly centers)
5)  Cool completely and refrigerate.  Once chilled top with whipped cream and fresh zest.  Serves 9.

Enjoy!

Angie


German Chocolate Cupcakes…..

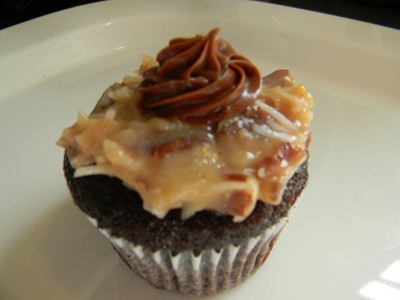
Four (possibly 2) bites of deliciousness!  Personally I don’t think that the traditional German chocolate cake portion of this dessert is chocolaty enough so I’ve improvised a bit.  If you know me you know that my favorite chocolate cake recipe in the whole wide world is the Hershey’s Perfect Chocolate Cake recipe on the back of the cocoa box.  It’s a simple one bowl recipe and makes about 30 cupcakes.  Baking tip for the cocoa cake.  Be sure to put the cocoa through a sifter with the rest of the dry ingredients.  Often there are clumps of cocoa and you don’t want them in your cake.

I made the traditional coconut/pecan frosting which is spectacular and thought I’d pipe my own touch onto the top.  Chocolate Cream Cheese Frosting.  Can more chocolate ever be wrong?  I think not.

German Chocolate Cupcakes

1 batch Hershey’s Perfect Chocolate Cupcakes, cooled completely

Coconut Pecan Frosting

1 cup evaporated milk
1 cup sugar
2 teaspoons cornstarch
3 beaten egg yolks (Freeze the egg whites and add to your next meatloaf)
1/2 cup unsalted butter
1 teaspoon vanilla
1 1/3 cups sweetened shredded coconut
1 cup chopped & toasted pecans (to toast, spread chopped pecans over a cookie sheet and toast in 325′ oven for 7-9 minutes.  Cool completely)

Whisk the first four ingredients together in a heavy medium size saucepan until well blended.  Add the butter and vanilla and stir over medium heat for 10-12 minutes or until it thickens.  Do not over cook. It doesn’t need to boil or bubble.  Add the coconut and toasted pecans.  Allow to cool completely before frosting the cupcakes.

Chocolate Cream Cheese Frosting

4 ounces softened cream cheese
2 tablespoons softened butter
1 1/2 cups powdered sugar, sifted with the cocoa
3 tablespoons cocoa
1 teaspoon vanilla
2-4 teaspoons of milk

Beat the cream cheese and butter until well blended with an electric mixer.  Add the powdered sugar/cocoa and vanilla.  Mix on low-speed until most of the dry ingredient is incorporated.  Add milk 1 teaspoon at a time until you get a nice thick frosting that you can pipe onto the cupcake.

Frost the cupcakes with the pecan frosting.  Pipe the top with the chocolate frosting.  Refrigerate.  Remove from refrigeration for 20 minutes before serving,

Enjoy!

Angie


Best Carrot Cake With Cream Cheese Frosting…..

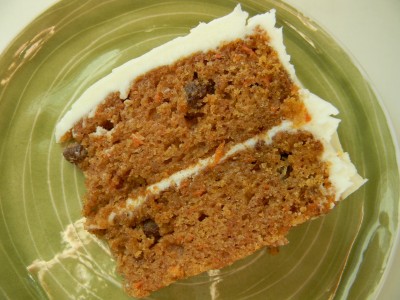
This is the most moist and delicious carrot cake you’ll ever taste!  This has just the right amount of texture.  It’s very moist and slightly dense and is amazing with cream cheese frosting!  I do not enjoy carrot cake that is loaded with thick, grated carrots and too many nuts and raisins.   Too chewy for my taste.  This recipe called for carrot baby food and crushed pineapple.  I’ve made a couple of revisions.  I pureed a 14 oz. can of sliced carrots and omitted crushed pineapple.  I added finely shredded carrots and a small amount of raisins.    Feel free to add finely chopped nuts and more raisins if you wish.   Simply irresistible!
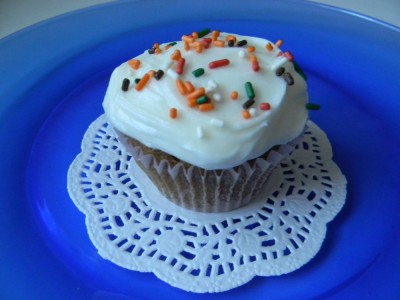
 As with any other cake recipe, you can make cupcakes.  The recipe will make approximately 2 1/2 dozen.  The upside to cupcakes is they take less than half the time to bake and much less time to cool.  They’re easy to serve, and they’re the perfect portion.  Top with sprinkles, who doesn’t love sprinkles???

Best Carrot Cake With Cream Cheese Frosting

2 1/4 cup all purpose flour
1 3/4 cup sugar
2 teaspoons cinnamon
1 teaspoon salt
1 teaspoon baking powder
1 teaspoon baking soda
1/4 cup raisins (optional)
1/4 cup finely chopped walnuts (optional)
1-14 ounce can pureed carrots or 14 ounces carrot baby food
1 cup oil
4 eggs
1 large carrot, peeled and finely grated (3/4 to 1 cup)

1)  Preheat the oven to 35o’.  Coat 2-9″ round baking pans with Pam cooking spray for baking or 9 x 13″ baking pan.  In medium size bowl combine all dry ingredients, raisins and nuts if you’re using.
2)  In large mixing bowl  add the pureed carrots through the grated carrot, mix to blend.
3)  Make a well in the center of the dry ingredients and add the wet all at once.  Mix until all dry ingredients are incorporated, do not over mix.
4)  Pour into baking pans.  For the two 9″ round pans bake 30-35 minutes.  For the 9 x 13″ bake for 45 minutes.  For cupcakes, spray the paper liners with cooking spray and bake for 18-20 minutes.  Test for doneness with a toothpick.   Cool completely.

Cream Cheese Frosting

1 8 ounce softened cream cheese
4 ounces softened butter (one stick)
1 teaspoon vanilla
3 cups powdered sugar
milk as needed

1)  With an electric mixer, beat the cream cheese and butter until creamy.  Add the vanilla and the powdered sugar.  Mix on the lowest speed of the mixer and add milk 1 teaspoon at a time to get a smooth spreading consistency.
2)  Ice the cake generously with the frosting.  Refrigerate until ready to serve and refrigerate leftovers (if any!)

Enjoy!

Angie


Pumpkin Crunch Pie…..

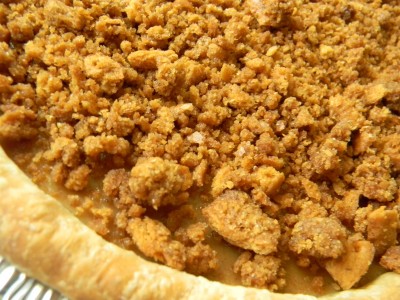
This interesting twist came about today when I baked my Thanksgiving pumpkin pies and one of them did not come out with a pretty, smooth top.  I thought about making a whipped cream topping but then thought I’d try something entirely different.  Originally I thought praline, but my peeps do not like nuts, so I came up with a mock praline topping. So simple, I just baked my crunch creation in the oven to caramelize the brown sugar, butter, and coarsely crushed graham cracker crumbs.  I cooled the concoction and just before serving I’ll sprinkle it over the top of my not so pretty pumpkin pie.   It’ll be a great contrast to the creamy custard pumpkin filling.  This would be quite delicious as an ice cream topping too.  So good!

Mock Praline Crunch Topping

2/3 cup coarsely crushed graham crackers
2 tablespoons brown sugar
2 tablespoons melted butter

1)  Crush the graham cracker crumbs and put into a small bowl.  Add the brown sugar and melted butter.  Mix well.
2)  Pour into a foil lined pie dish and bake at 350′  for 12-15 minutes ( turning every 5 minutes) or until the mixture is nicely browned and caramelized.  Cool completely and add to the top of a cooled pumpkin pie or ice cream.

Happy Turkey Day!

Angie

Graduation Cupcakes…..

I decided on cupcakes for Jack’s graduation cake.    I waffled between a large decorated cake, a large decorated cookie, and cupcakes.   Cupcakes are a great choice for so many reasons.  They bake in about 18 minutes and cool completely in about an hour.  They’re completely self serve with no plate and fork required.   They’re perfectly portioned and easy to eat.  I like that the dessert table looked nice the entire evening.  I left the cupcakes out on the dessert table all day.  At the end of the day I put the leftover treats in the refrigerator.

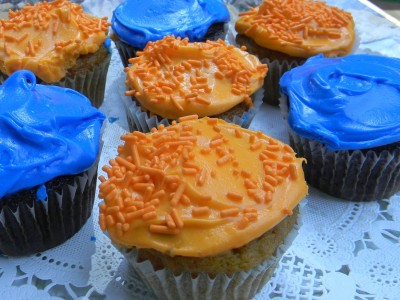
I chose to make chocolate and pumpkin cupcakes.  I used my Pumpkin Squares with Cream Cheese Frosting recipe.  The recipe made about 2 1/2 dozen cupcakes.  Of course, my go to chocolate cake recipe is the Hershey’s “Perfectly Chocolate” cake. (made about 2 1/2 dozen cupcakes)   This one bowl recipe will become your favorite chocolate cake recipe too!  It’s on the back of the can, but I’m going to give it to you.  The writing is really small!  I’ll also give you the frosting recipe.

I doubled the cream cheese frosting recipe and used Wilton gel colors to make his high school colors.  They work best because you can get very intense color without totally watering down your frosting.  So fun and so hard to resist!

Hershey’s “Perfectly Chocolate” Chocolate Cake

2 cups sugar
1- 3/4 cups flour
3/4 cups Hershey’s Cocoa
1- 1/2 teaspoons baking powder
1- 1/2 teaspoons baking soda
1 teaspoon salt
2 eggs
1 cup milk
1/2 cup vegetable oil
2 teaspoons vanilla extract
1 cup boiling water

1) Preheat oven to 350′.  Line muffin pan with cupcake liners and coat the liners with cooking spray. 
2)  Combine dry ingredients in large bowl.  Add eggs, milk, oil and vanilla; beat on medium speed for  2 minutes.  Stir in boiling water (batter will be thin).  Fill each cup about 2/3 full.
3)  Bake for 16-18 minutes.  A toothpick should come out clean.  Cool completely.  Makes about 30 cupcakes.

*for two 9″ pans, grease and flour pans.  Bake for 30-35 minutes.  Cool for 10 minutes.  Remove from pan onto wire racks and cool completely.

Perfectly Chocolate” Chocolate Frosting

1 stick (1/2 cup) butter
2/3 cup Hershey’s Cocoa
3 cups powdered sugar
1/3 cup milk
1 teaspoon vanilla extract

1)  Melt butter.  Stir in cocoa.
2  Alternately add powdered sugar and milk, beating on medium speed to spreading consistency.  Add more milk, if needed.  Stir in vanilla.  Makes about 2 cups.

Have a wonderful week!

Angie

Orange and Cream Simple Summer Dessert…..

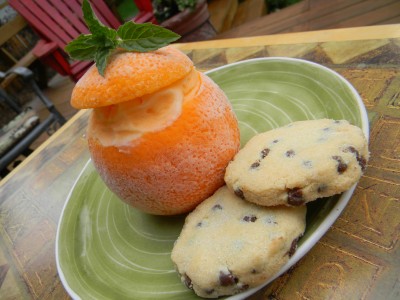
My friend Mary had this dessert at a friend’s house and raved about it.  She shared the recipe with me and I changed it up a little with the kind of ice cream I used and I served it with rich butter shortbread cookies.  This dessert takes absolutely no time at all and makes for a very beautiful presentation.  Love the layers of orange sherbet and real vanilla ice cream paired with the buttery chocolate chip shortbread cookie…need I say more??????

Here we go….

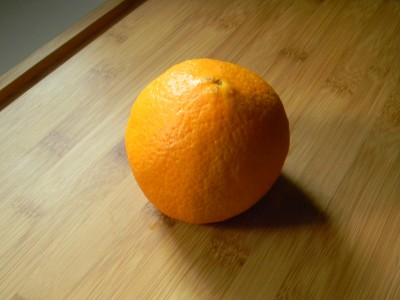
Start with a good size navel orange.

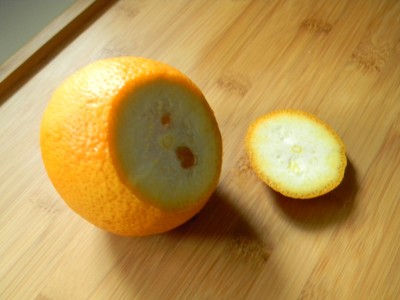
Slice off the least attractive end of the orange just enough to make it sit evenly on a flat surface.

It should sit like this.

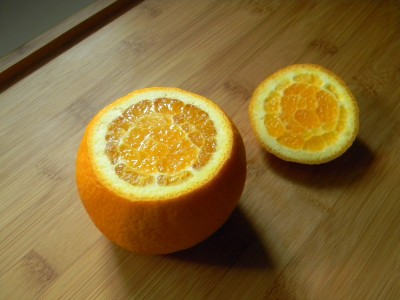
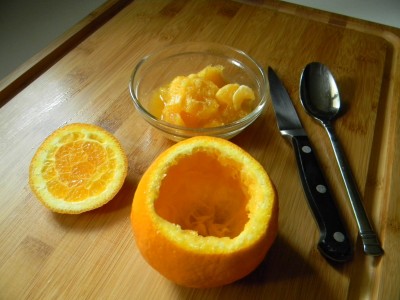
Next using a serrated knife, slice off the top of the orange.  Reserve the top for when you serve.

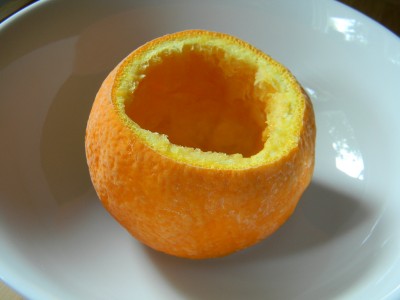
Next run a sharp paring or grapefruit knife around the inner edge of the orange to remove the flesh.  Carefully cut as much out as possible then using a spoon, scoop out the rest of the flesh.  Reserve for smoothies.  Place the hollowed out orange with the tops into the freezer.  Allow to be in the freezer for at least two hours before serving.

Get all of your dessert ingredients out and ready to go before removing the oranges from the freezer.  You’ll need serving plates, ice cream and sherbet, an ice cream scoop, the cookies if you’re serving them, and fresh mint sprigs for garnish.  Handle the outside of the orange as little as possible as the heat from your fingers will leave fingerprints on the rind.   Use a spatula to remove the orange from the freezer plate right onto the serving plate.

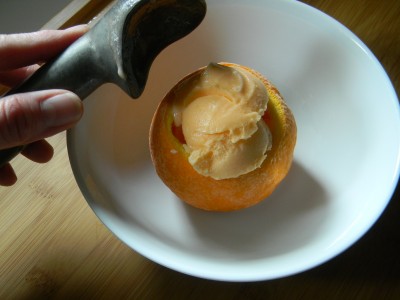
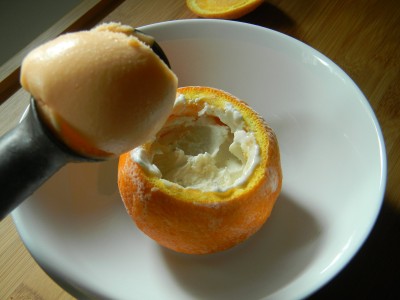
Add a scoop of the orange sherbet to the frozen orange and pack in with a spoon. 

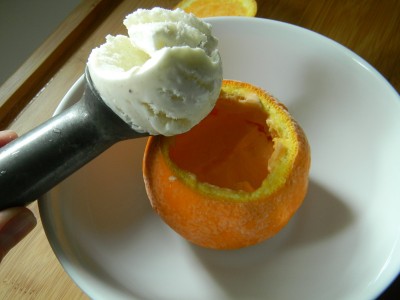
Next add a scoop of vanilla ice cream.  Pack into the orange with a spoon.

Lastly, add a generous scoop of the sherbet.  Add the orange top or “hat.”   Garnish with a fresh mint sprig and add a couple of beautiful cookies to the plate.  Elegant and delicious!

Orange and Cream Simple Summer Dessert

4 medium oranges, leveled off at the bottom and hollowed out, reserving the tops
1 pint of orange sherbet
1 pint of real vanilla bean ice cream
Fresh mint leaves for garnish
8 chocolate chip shortbread cookies or any other pretty butter and chocolate cookie

1)  Level off the oranges with a serrated knife so that they sit nicely on a flat surface.  Slice off the top of the oranges, reserving the tops.  Carefully remove the flesh of the orange with a grapefruit knife or paring knife.  Remove the remainder of the flesh with a spoon.  Place the orange cups and the tops into the freezer on a plate for at least two hours.
2)  When ready to serve, collect everything you’ll need before removing the oranges from the freezer.  You’ll need serving plates, the ice cream, the sherbet, an ice cream scoop, the mint, and the cookies.
3)  Remove the oranges from the freezer.  Using a spatula, place an orange on each serving plate.  Add a scoop of sherbet, pack into orange, then a scoop of vanilla, pack into orange with a spoon.  Lastly, add a generous scoop of the sherbet.  Top with the orange top and a sprig of mint.  Place the cookies on the plate as well.  Serves four very happy guests:-)

Homemade Cheese Cake from Scratch…..

Cheese cake…simple…no fluff…creamy….gentle…not too sweet….most excellent simple dessert.  This is my Mom’s recipe.   I grew up eating this delectable dessert.  I remember first hearing the name of the dessert and wrinkling up my nose….what?  Cheese in dessert?!  No way!
It is quite delicious with a fruit topping or chocolate gnache.  I recommend you enjoy it plain so you can really taste the cream cheese and the yummy graham cracker crust.  The recipe is really easy, it goes together in a matter of 15 minutes.  Refrigerate after completely cooling on the counter on a rack.  Try not to overbake as this will cause the top to crack. 
Homemade Cheese Cake

For the crust:
1 1/3 cups graham cracker crumbs
1/3 cup sugar
1/3 cup melted butter

For the filling:
2 8 ounce packages softened cream cheese
3 tablespoons flour
2/3 cup sugar
2 large eggs
¾ cup milk
1 ½ teaspoon vanilla

1) Preheat oven to 325’. Line the bottom of a 10” spring form pan with non stick foil. Spray lightly with cooking spray. (This will make for easy removal of the cake when it’s done.)
2) Combine the crust ingredients in a small bowl. Press into the bottom and up the side of the pan about ½”. Bake for 5 minutes. Remove from oven and cool on rack.
3) With an electric mixer, beat the cream cheese. Add the flour and sugar, beat well. Add eggs, milk, and vanilla, beat. Scrape down the sides and beat until all ingredients are incorporated.
4) Pour into pan. (it’s ok if it’s still a little warm) Bake in the center of preheated oven for 38-40 minutes. Do not over bake or the cake will crack in the center. To check for doneness, carefully tap the pan, if the center appears to be set, it’s done.
5) Cool completely before removing from pan. Carefully pull foil away from cake and place onto a serving plate. Enjoy with fresh fruit or chocolate.