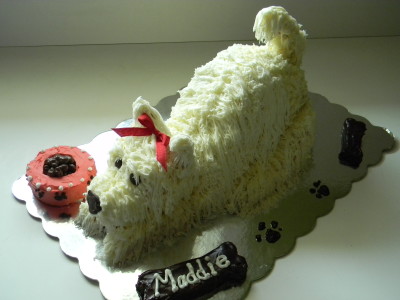
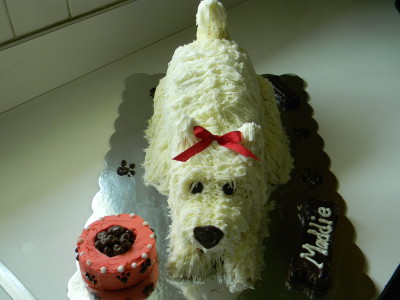
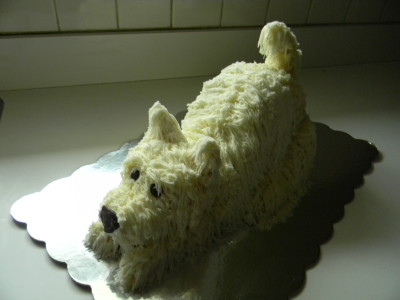
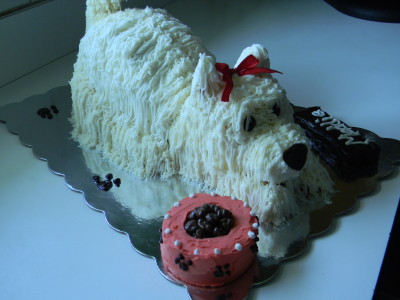
Yes, this is a cake. Isn’t she sweet? I made it for my dear friend’s daughter Maddie as you can see. I used a special tip, it’s got tiny holes in it and was actually quite hard to squeeze the frosting out. It was called a fur and grass tip, I found it on Etsy quite easily. As always, I ONLY make real butter cream so I had to add a little more milk to make it come out of the tip more easily. Unlike frosting made with shortening, butter cream frosting gets very soft by the warmth of your hands on the piping bag. I piped the cake in sections, putting it into the refrigerator to allow the butter cream to set up. I left the piping bag on the counter, if you were to refrigerate it, it would be impossible to squeeze the frosting out. Best to use a heavy duty piping bag, the heat transfer is far less than using a plastic or disposable one.
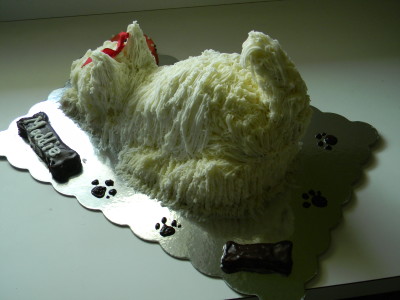
I added an edible dog bowl filled with raisinettes, chocolate dog foot prints and a couple of gnash covered pieces of cake cut into dog bones. If I were to make another cake like this I would trace around the bones with white icing to better define them. Next time. The eyes and nose are melted semi sweet chocolate chips. I piped them onto a piece of wax paper and refrigerated them until they were set. You can’t really handle them until you’re 100% sure you’re ready to set them into the face.
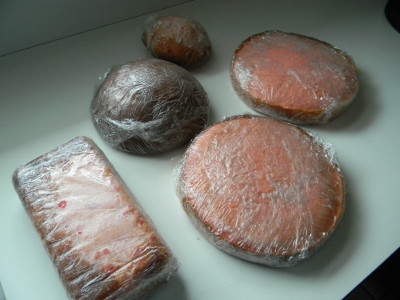
I wanted you to see all angles…I absolutely LOVED making this cake! I’m going to now show you what I did to create her. I baked a double recipe of yellow cake. The guest of honor wanted a cherry cake so I added rinsed, drained and minced maraschino cherries. You can use your favorite recipe or even a box recipe. Bake plenty of cake, you’ll need it. Most importantly, make your cake ahead of time, wrap with Saran wrap well and freeze. Working with partially frozen cake is a total must! Fresh room temperature cake is too soft and crumbly and would be way too hard to work with.
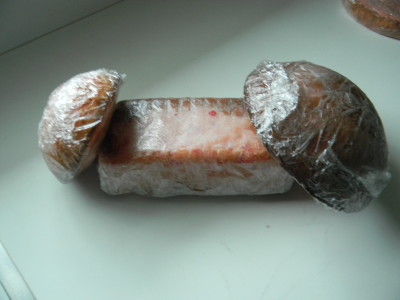
I used a couple of dome-shaped pans, one for the head and one for the little bottom that sticks up in the back. I used a regular loaf pan for the body and thought I could use two 9″ cakes for the legs, tail and ears. There was a good amount of one cake left, I put it back in the freezer to make a dessert trifle later. Or there may be family members available to help with those pesky left over delicious pieces of cake!
It is time to make a big batch of butter cream frosting or, the glue you will need to sculpt your cake. You’ll also want to apply a “crumb” layer of frosting to the entire cake once you’ve got it into the shape you like.
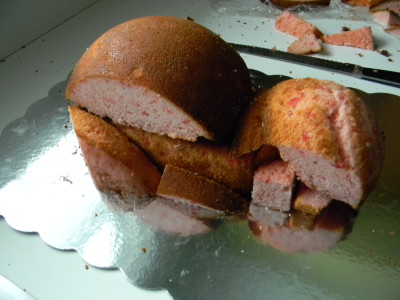
I started playing with the pieces, like a puzzle. Time to unwrap the cakes and start sculpting. The cool thing here is you can add or cut away pieces as you to shape the cake.
At first I thought to place the cake on another cake base, no way! Would’ve been way too hard to keep the bottom layer clean. I thought to assemble the cake on another pan but the transfer would’ve been disastrous! This was the best bet. I could easily rid the board of crumbs or unwanted frosting. You can get nice cake boards at Michael’s Craft Store.
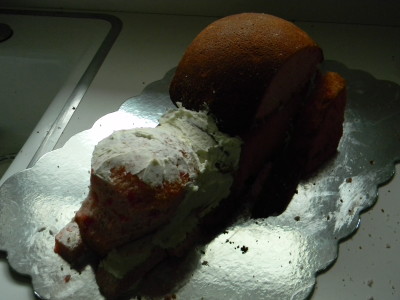
Here I began the gluing process. You want all cake components to be solid. Might be a bit messy at this point, it’s fine! Plenty of time to clean up the board using a moist paper towel.
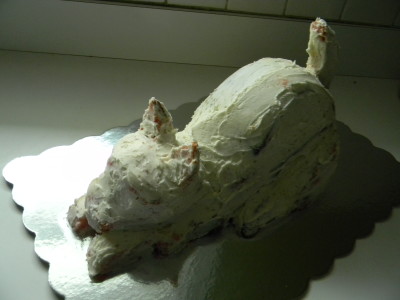
I added the tail with a 6″ skewer and the ears with a couple of toothpicks. At this point it is looking very cat-like. Ryan quickly pointed this out to me and he was right. I cut away a little more of the face below the eyes and added a bit more frosting to square off the face. The cake is now coated with the “crumb” layer of frosting. It’s time to start piping.
Begin at the very bottom of the cake and work your way up. I got too involved to take pictures as I went! I started with the front paws and piped around the perimeter of the whole cake. I did the face, head and ears all at once. I did the back up through the tail then I had to put him into the refrigerator to set up a bit. I took her out after about 30 minutes and finished piping.
I kept the cake refrigerated overnight and in the morning added the finishing touches. The dog bowl with kibble, the dog bones, the bow and the paw prints.
At this point, the cake can set out at room temperature until serving. Room temperature cake is always better than cold cake.
Happy Birthday Maddie! I am quite sure this is a cake that she will never forget!
Enjoy creating!
Angie

 Follow me on Twitter