Simplest Ginger Beef Stir Fry…..

I’ve decided that this is my absolute favorite stir fry.  I normally make a sauce that consists of cornstarch for thickening, chicken broth and other flavorings.  What I love about this is that there is no thick sauce covering up the flavors of the meat and the vegetables.   You could easily make this with boneless skinless chicken thighs or breasts, shrimp, or tofu and veggies. Use any vegetables you like.  Just remember to stir fry the ones that take longer first and add the rest accordingly

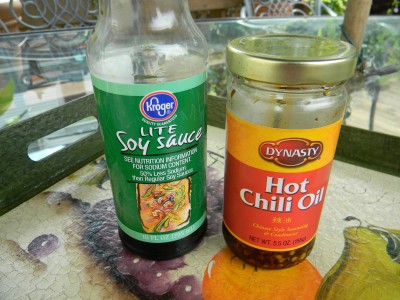
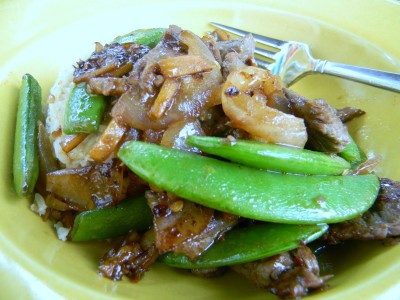
Light soy sauce and hot chili oil are the stars of this dish.  The hot chili oil has a delicious garlic flavor as well as some heat.  Of course, there’s ginger and garlic which are essentials in a good stir fry.  Have all ingredients ready to go before heating the pan.  Have the rice going as well.

Simplest Ginger Beef Stir Fry

For the marinade:

1 lb. lean sirloin, trimmed of any excess fat and thinly sliced
2 teaspoons cornstarch
2 teaspoons minced ginger
2 teaspoons or 2 cloves minced garlic
2 teaspoons light soy sauce

For the stir fry:

1 1/2 tablespoons canola or vegetable oil
2 cups snap or snow pea pods, cleaned and strings removed
1 large onion, thinly sliced
1 thumb size piece of fresh ginger, peeled and cut into long thin strips
1 tablespoon light soy sauce
1 teaspoon hot chili oil, stir it well before measuring out

4 cups steamed rice

1)  Trim and slice the beef and place into a small mixing bowl.  Sprinkle the cornstarch over the beef.  Mix well with your hands to coat.  Add the rest of the marinade ingredients and mix well.  Allow to marinate in the refrigerator for at least 30 minutes.
2)  Prepare the peas, onion and ginger.
3)  Heat a large skillet over high heat.  Once the pan is very hot, add the 1 1/2 tablespoons of canola/vegetable oil.  Add the ginger and onions.  Stir fry until the onions/ginger get nicely brown.  Remove them from the pan and put into a small bowl.  Add the beef, being sure not to crowd in the pan.  Try not to stir until you’re sure the beef is brown.  Add the onions back to the pan, the pea pods, soy sauce and chili oil.  Cook another 2 minutes or until the peas are bright green.  Serve over steamed rice.   So good!

*Longest cooking veggies to lowest.  Add them to the pan in this order.

Carrots
Mushrooms
Bell peppers
Onions
Broccoli
Pea pods
Green onions
Bean sprouts
Baby corn
Water chestnuts
Bamboo shoots

**White steamed rice tip.  Rinse the rice thoroughly in a mesh colander under cool water.  This will remove much of the starch that can make rice gummy.  Add water to the pan 2 parts water to 1 part rice, bring to a boil, reduce heat to medium and allow the lid to be slightly ajar.  Cook for 17 minutes.

Enjoy!

Angie
Nature’s Beauty…..

Good evening-

We thoroughly enjoyed our Michigan vacation!  Lazy mornings and hot afternoons spent on the beach of beautiful lake Michigan.

I went for a walk and picked all of these lovely flowers along the side of the road.  Aren’t they beautiful?  I remember picking wild flower bouquets for my Grandma Henderson.  She graciously accepted my gift even though she had major pollen allergies.  She was so cute!

I think it’s interesting that we (myself included) plant all non indigenous plants and try like crazy to keep them alive during extreme mid-western weather conditions.  Plants native to our area do not suffer nearly as much as the nonindigenous ones.  Even though most would consider what I picked weeds, they flourish in drought conditions and are so pretty and sweet.  Other plants that thrive in the heat are blueberry bushes.

Summer vacation would not be complete without a morning spent blueberry picking.  We ended up with about 20 pounds.   I went through them tonight and put them in the freezer.  I plan on using them to make blueberry pie, blueberry jam and tomorrow morning, blueberry streusel muffins.  Additionally, I think I’ll treat my clients to a green salad with blueberry balsamic vinaigrette, yowza!  This dressing is fantastic with toasted walnuts and blue cheese.  Do try!

I will be going to sleep tonight with blueberries dancing in my head!  Have a lovely night~

Angie


Oatmeal Raisin Sandwich Cookies…..

Wow, posting three days in a row!  Feeling a little more settled and not so frazzled these days.

I’m finishing up a cookie order for a sweet table for a dear friend’s wedding.  I made all of her favorites.  Oatmeal Raisin Sandwich Cookies(pictured),  Snickerdoodles, Raspberry Bars, Chocolate Chip with M & Ms the colors of her wedding, Peanut Butter Chocolate Chip Bars, and Iced Sugar Cookie Hearts, with icing the color of her wedding, of course!

This cookie tastes as delicious as it looks.  I use the smallest cookie scoop so that the cookies are uniform and don’t come out too large.  Simply make my Oatmeal Raisin Cookies and the filling below.  Add any ingredients to the cookies you like.  They’d be delicious with walnuts and craisins or pecans, mini chocolate chips and raisins.

The cookie recipe makes about 3 dozen large cookies.  If using a small scoop, the recipe should yield about 5 dozen cookies or 2 1/2 dozen sandwich cookies.

It is very rare that I use shortening or margarine in a recipe.  It is needed to create the fluffy texture and will hold up nicely in the heat.

Fluffy Cookie Filling

1/4 cup softened butter
1/4 cup softened margarine
2 tablespoons shortening
1 1/2 lbs. powdered sugar
1 teaspoon vanilla
4 tablespoons milk

In a stand mixer, beat the butter, margarine and shortening until well blended.  Add the powdered sugar, vanilla and milk one tablespoon at a time while the  mixer is on low.  You may have to adjust the liquid depending on the humidity.    It should be spreadable and fluffy.

Enjoy!!

Have a great weekend:-)

Angie


Indonesian Quinoa Salad With Peanut Dressing…..

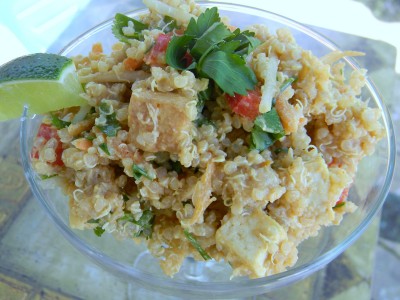
Bring this salad to your next pot-luck or BBQ.  If you like peanut dressing you’re going to love this!  I adapted this recipe from a Cooking Light recipe for Indonesian Vegetable Salad with Peanut Dressing.  I changed it up a bit and absolutely LOVED this salad! (I changed the dressing recipe slightly with the use of natural peanut butter but that’s it)  Love it with the tofu and the quinoa but it would be equally delicious with shredded cooked chicken and pasta.  So good!

Indonesian Quinoa Salad With Peanut Dressing

For the salad:

2 cups cooked quinoa, cooled
1 cup shredded carrot
1 1/2 cups bean sprouts
1 red bell pepper seeded and chopped
2 cups English cucumber cut into slices then quartered
1 small bunch fresh cilantro, chopped

1 (14-ounce) package extra-firm tofu, drained
1 tablespoon canola oil
1/4 teaspoon salt
Dressing:

1/3 cup natural creamy peanut butter
3 tablespoons hot water
3 tablespoons fresh or bottled lime juice
1 tablespoon lower-sodium soy sauce
2 teaspoons brown sugar
2 teaspoons Thai red curry paste
1/4 teaspoons salt
1/8 teaspoon black pepper

1)  Cook the quinoa according to package directions and place in a large mixing bowl to cool.
2)  Prepare the tofu by slicing into 1/2″ slices and place on several layers of paper towels.  Cover tofu with additional paper towels and let stand for 5 minutes.  Cut into 1/2″ cubes.
2)  Once the quinoa is cool, add the carrot through the cilantro.
3)  Heat a non stick skillet over medium heat until hot and add the canola oil.  Add the tofu and brown on all sides.  Season with salt and pepper.  Add to the salad bowl.
4)  Whisk all dressing ingredients together in a small mixing bowl.   Pour over the salad ingredients and mix to evenly coat all ingredients.  Serves 4.

Enjoy!

Angie

Whole Grain Cranberry Scones…..

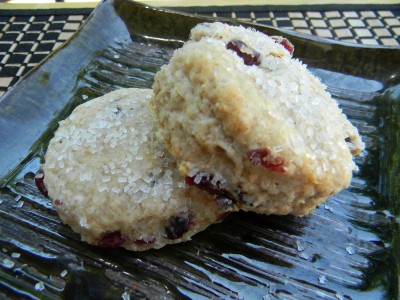
These slightly sweet goodies will totally make your morning, afternoon, or night!   Is there really a bad time to have one for gosh sakes???   I love this original recipe as is but you can customize it to whatever you like.  Try it with dried cherries and chopped walnuts, chocolate chips, raisins and cinnamon (add 1 teaspoon to the dry mixture) or coconut and pecans…the possibilities are endless!

I topped them with large sugar granules.  You can find them at Michael’s Craft store.

Whole Grain Cranberry Scones

2 cups flour
1 cup whole wheat flour
1/2 cup sugar
1 tablespoon baking powder
1 teaspoon salt
8 tablespoons cold unsalted butter cut into 1/2″ cubes (if using salted butter omit the salt in the recipe)
1/2 cup oatmeal, old fashioned or quick cooking
1/4 cup wheat germ
1 cup craisins
1 1/4 cups buttermilk (you can substitute the milk with a couple of teaspoons of cider or white vinegar)
1 tablespoon orange or lemon zest
2 tablespoons milk
1-2 tablespoons large sugar granules (regular sugar is fine too)

1)  Preheat the oven to 375′.  Line a cookie sheet with parchment paper.
2)  In a large mixing bowl add the flour through the salt.  Add the cold butter cubes and work into the flour with a pastry blender or your fingers.  You can also do this in a food processor.  Process until there are no large lumps and the flour resembles cornmeal.
3)  Add the oatmeal, wheat germ and craisins and mix to combine.  Make a well in the middle of the dry ingredients and add the buttermilk and orange zest.  Stir until just combined.  It’s OK if it’s a bit sticky.  Flour the counter top and plop the dough onto the counter.  With floured hands, knead 2-3 times into a smooth ball of dough.  Add a little flour if necessary.  Roll out to about 3/4″.  Cut with a round biscuit cutter and place on parchment paper on the cookie sheet.
4)  Using a pastry brush, coat the scone tops with milk and sprinkle them generously with sugar.  Bake for 20-25 minutes.  Cool completely before storing in an airtight container.  They are best the day you make them.  Makes about twenty 3″ scones.

Enjoy!

Angie


Wedding Shower Favors…..

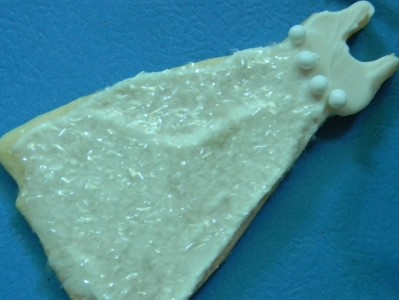
I love creating beautiful cookies.    I found these bead like little balls on line awhile ago and had this flaky iridescent sugar on hand which I used for the bottom of the dress.  I used melted white chocolate instead of icing which I applied like you would regular icing.  I used a recipe that is more like a shortbread cookie.  Basically butter, sugar, flour and eggs, no leavening to make the cookie rise.  This is the best type of recipe to use because the cookie doesn’t rise and lose the crisp shape of the cookie cutter design.

Anytime you want to decorate a cookie using white or dark chocolate, you’ll want to add the sugars and decorations before the chocolate sets up.  Makes sense, right?  Once it sets up the decorations are held firmly in place.  This will make for easy packaging.  Wrap them individually in cellophane bags and add a pretty ribbon.  Lovely.

Have a great evening!

Angie

Roasted Poblano, Corn and Tortilla Chowder…..

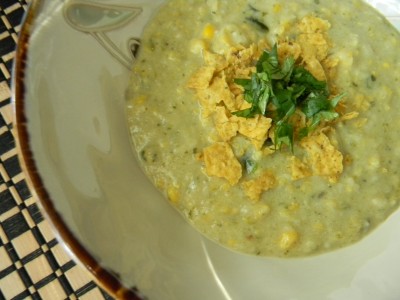
Recently I saw Ina Garten on the Food Channel and she used corn tortillas to thicken a chicken tortilla soup.  Brilliant!  Not to mention the wonderful flavor the tortillas add to the soup.  This soup is surprisingly light for how decadent it tastes!  Make it vegetarian by using vegetable stock in place of the chicken stock.  So good!

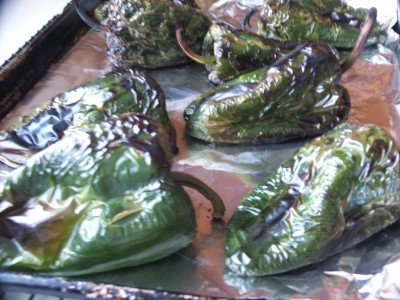
The first thing you need to do is roast the poblano peppers.  This is a very simple process and a very necessary step for flavor in this soup/chowder.

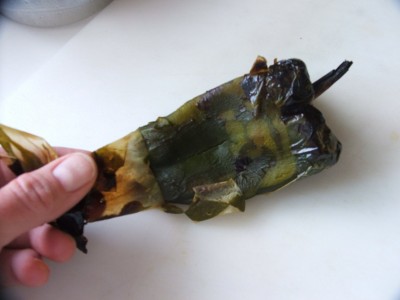
Begin by broiling or grilling the peppers until they get charred and blistered.  Remove from heat and put them into a bowl and cover tightly with foil and allow them to steam for about 20 minutes.  This will make it easier to remove the skin.

Once they’re cool enough to handle, carefully remove the skins from the peppers.  Do not rinse them, you’ll lose the “charred” flavor.

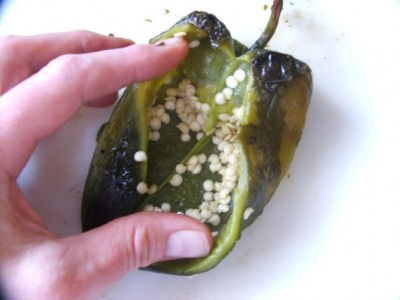
Lastly, remove the seeds and membrane.  Chop coarsely.  They’re ready for the chowder.

Roasted Poblano, Corn and Tortilla Chowder

6 roasted poblano peppers, peeled, seeded and chopped
2 cups chopped sweet onions
3 tablespoons olive oil
4-6 cloves finely chopped garlic
1 teaspoon dried rosemary, crushed between your fingers (will release the flavor)
1 1/2 teaspoons cumin
1 bay leaf
4 cups chicken stock, salt free preferably (you can add your own seasoning later, if you use stock with salt, adjust the addition of salt later in the recipe)
6 cups of sweet white corn (fresh or frozen)
4 cups 1% milk (or whatever you have)
6 corn tortillas, cut into strips
2 tablespoons fresh lime juice (or bottled)

Garnish
Tortilla chips coarsely crushed
Fresh cilantro
Fresh lime wedge
1)  Prepare the poblano peppers. Rinse the peppers and place under the broiler in the oven or on a hot grill.  Cook until they’re nicely blistered.  Put them into a bowl and cover with foil or a lid to steam.  This will make the skins easier to remove.   When they’re cool enough to handle,  remove the skins, seeds and membrane.  Coarsely chop and refrigerate until you’re ready to use.
2)  In a soup pot, add the olive oil and onions.  Cook for 7-10 minutes or until soft.  Add the garlic, rosemary, cumin and bay leaf.  After about one minute, add the the stock, prepared peppers and corn.  Bring to a low simmer for about 20 minutes.  Add the milk and bring it up to a simmer again, do not boil.  Season with salt and pepper.
3)  Add the tortilla strips and stir often until the tortillas have completely dissolved.  If you’d like it a little thicker, add additional tortilla.  Stir in the lime juice.  Garish with crushed crispy tortillas, chopped cilantro and a lime wedge.  Makes about 12 one cup servings.

Enjoy!

Angie


UFO Identified, Plantains & Fried Plantains….

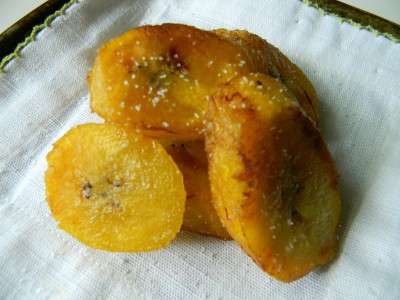
Thank you Chels for identifying this UFO!   Hard to believe that something so unattractive could turn out so beautiful.  The UFO in the previous post is a plantain.  This South American fruit couldn’t be easier to prepare.  It resembles a banana but has a different taste and texture than a regular banana.  For starters they have a much more starchy taste and unlike a regular banana can’t be just peeled and eaten.  They require a little love before you can enjoy.  Because of the amount of starch they fry beautifully.

I prefer a darker plantain as they are a bit sweeter and have a softer texture.  The peeling is not as pliable as a regular banana either.  Slice off the very top and bottom and run a sharp knife through the skin and peel.  Slice the plantain on a diagonal.

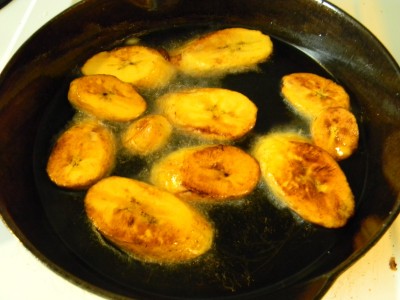
Next heat about 1/2″  of canola oil to about 325-350′.  I use a shallow cast iron skillet as it has excellent heat conduction.  They take only minutes on each side to brown.

Allow the fried plantains to drain on paper towel.  Season simply with kosher salt and you’re ready to serve.                      Serve as a delicious side dish alongside  Grilled Flank Steak with Chimichurri Sauce for an authenthic South American dinner.

Interesting and very delicious!

Have a great day!

Angie

Beautiful Easter Egg Cookies…..

I just love to decorate cookies.  These are pretty and equally yummy.   My cut out cookie recipe is very basic.  I mix the dough the day before I plan to bake.  This gives the dough plenty of time to chill in the refrigerator.  Remember that the first batch you roll out is a little tough, after that, when you add the dough scraps to a fresh piece of dough, it gets easier to manage and roll out.

Check out my cookie baking tips.

When working with chocolate here’s what I do.  I use semi-chocolate chips and melt in the microwave for 30 second intervals.  Mix between each interval.  Microwave the chocolate until the chocolate is smooth when you stir.  Do not over heat, it will burn.  Do not allow any moisture/water to get into the chocolate.

Instead of dipping cookies into chocolate, I spread it with a spatula, like icing.  The best thing about this is that it sets up beautifully and make them very easy to transport.

Step 1:  mix dough, chill over night.
Step 2:  bake and cool cookies
Step 3:  melt chocolate chips and spread over cookie.  Add any decorations into the melted chocolate.  It will set up and keep decorations in place.
Step4:  once the chocolate is completely set, make simple icing and spread over cookie.  Allow the cookies to sit out at room temperature for several hours or overnight.  The icing will set and the cookies will package beautifully or go onto a tray without getting messed up.

Best Roll Cut Out Sugar Cookie Recipe

2 cups sugar
4 sticks unsalted butter, one pound at room temperature
5 large eggs
1 tablespoon vanilla
7 ½ cups all purpose flour
4 teaspoons baking powder
1 teaspoon salt

Icing (recipe below)

1) In a large mixing bowl, beat butter until fluffy and add one half of the sugar, beat, then add the rest. Add two eggs and beat. Scrape down the side of the bowl. Add the remaining three eggs and vanilla, beat until nicely incorporated.
2) Lightly measure out flour into a separate mixing bowl. Add baking powder and salt, whisk until blended.
3) Add half of the flour mixture to the egg/butter mixture and beat well. Add remaining flour and blend until all ingredients are incorporated.
4) Shape into a large ball and wrap in plastic wrap, then put into a large zip bag. Refrigerate for a couple of hours or overnight.
5) When ready to bake, allow to sit at room temperature for 30 minutes. Preheat your oven to 375’ and line cookie sheets with parchment paper. Have cooling racks ready to receive hot cookies.
6) Cut off a chunk and begin working with your hands to make it pliable enough to roll out on a floured surface. Roll to 1/8” thickness. Cut out with your favorite shapes and place on prepared sheets, leaving at least 1” of space between cookies. Bake for 7-8 minutes. Cool for five minutes before removing from cookie sheet onto a rack. Cool completely before icing.

For the icing:

3 cups powdered sugar
milk or water
1/2 teaspoon clear vanilla
gel food coloring, available at craft stores such as Michael’s

Put the powdered sugar into a medium size bowl.  Add liquid small amounts at a time and stir.  You will want the consistency to be thick enough that it will not run off the cookie but loose enough to easily spread.  Don’t worry, if it isn’t perfect on the first cookie you can either add more liquid or more sugar to get the right consistency.

When making different colors, use small bowls for different colors.

For the tie dye affect ice the cookie with white icing.  With a toothpick, dip into another colored icing and simply swirl through the freshly iced white cookie.  Very pretty.

Have a blessed Easter weekend with your family and friends!

Angie

Traditional Croatian Easter Bread (Sirnica)…..

I absolutely love learning about food traditions of other ethnicitys.    I think it’s my favorite part about being a cook.    Every week I try to make something I’ve never made before, sort of a dinner passport to different places all around the world.  This holy week, I’ll be making Croatian Easter Bread.   Check out another interesting version of this bread made with boiled, colored eggs, so interesting and beautiful!

Heather with her darling daughters Sadie,Clara, and Fiona.

I first had the pleasure of tasting this delicious bread when my friend Heather surprised me with a loaf right before Easter last year.  I was honored that she would share a loaf of her treasured family recipe.    It had a gentle yet distinctive citrus taste and was very pleasantly sweet without being too sweet.  Tender, moist, and delicious.   Of course, after the first bite I wanted to make this bread for all Easter Dinners going forward.  Heather kindly shared her recipe.

Try this Croatian Easter Bread.  It may become the next family tradition in your family:-)

Traditional Croatian Easter Bread
(Sirnica)

Ingredients:

2 cups milk
1 package active dry yeast or 2 ¼ teaspoon

½ cup softened butter (1 stick)
½ cup sugar
2 large eggs
1 teaspoon salt
Zest of half of a lemon and half of an orange
6 cups all purpose flour
Crushed sugar cubes or sugar for dusting

1) Slightly heat the milk in a microwave. Add the yeast and set aside. (about 10-15 minutes or until yeast is dissolved and a little bubbly)

2) Meanwhile, in a large bowl or stand mixer, beat the butter, and sugar, then add the eggs and salt, and zest, beat until well blended. Add the yeast-milk mixture and half of the flour, beat well. Add remaining flour gradually, until a smooth, soft dough forms. (you may not use all the flour or may require more)

3) Place the dough in a large greased bowl, burning to coat both sides, and let rise, covered, until doubled. Punch down and turn out onto lightly floured surface and knead for 2 minutes.

4) Preheat oven to 375′.  Divide dough into 4 to 6 equal pieces, shape into a nice round ball. Cover and allow to rest 5 minutes.

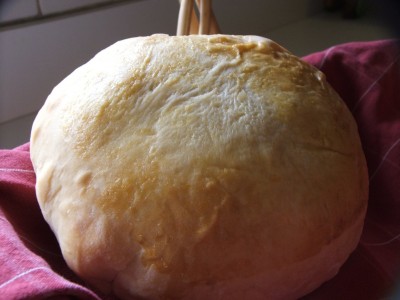
5) Place dough on cookie parchment lined cookie sheet. Egg wash the dough with 1 large beaten egg and 1 tablespoon of water. Sprinkle with crushed sugar cubes. Bake for 20 minutes or until golden brown. Cool completely.

*one way to check if a yeast bread for doneness is to thump it with your fingers, if it sounds hollow, it’s done. Be sure that you have a nice brown color was well.